Why Acting Fast on a Flooded House Can Save You Thousands
When you return to a flooded house, time is your most valuable resource. Water moves fast, but mold moves faster—often within 24–48 hours of the initial exposure. Acting quickly and methodically can be the difference between a manageable recovery and a prolonged, expensive rebuild.
It’s also critical to understand your coverage before the next storm. Many homeowners are surprised to learn that standard homeowners insurance typically does not cover damage from external flooding. Over a 30-year mortgage, homes in low- or moderate-risk areas are statistically more likely to experience a flood than a fire, which makes preparation and clear action steps essential.
This guide walks you through safe reentry, cleanup, drying and mold prevention, documentation for insurance claims, and rebuilding with resilience. Each step is designed for clarity, safety, and cost control, with Florida-specific considerations where relevant.
Critical First Steps for a Flooded House
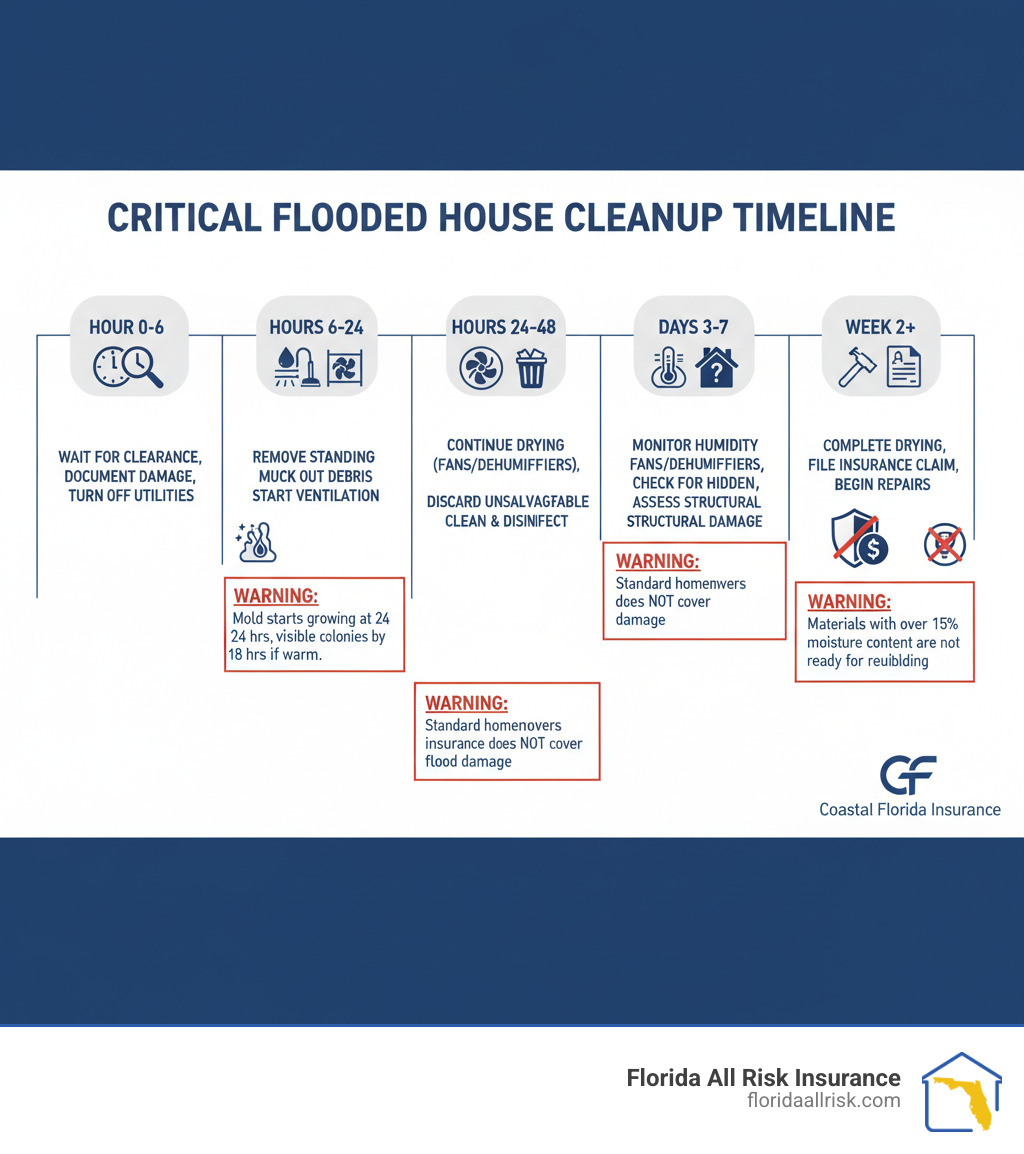
Move through these steps in order after authorities declare the area safe to reenter:
- Wait for official clearance before returning to your property.
- Turn off electricity and gas at the main shutoffs before entering.
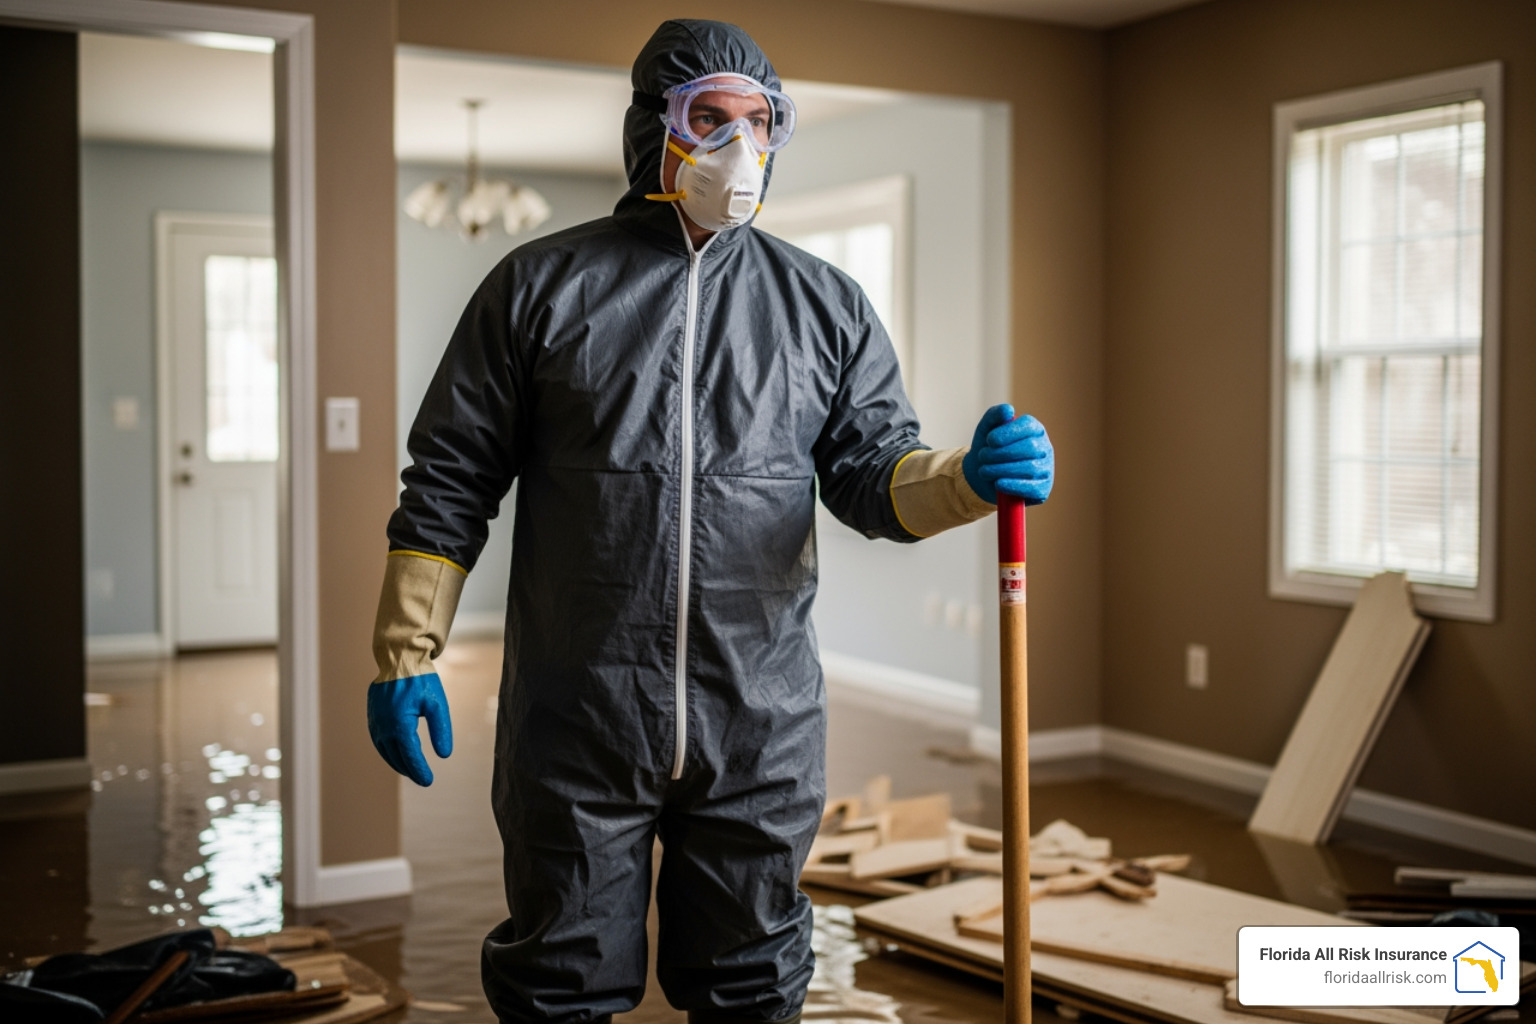
- Wear protective gear: an N95 or P100 respirator, goggles, waterproof boots, and heavy-duty gloves.
- Document everything—photos and videos of all rooms, walls, ceilings, flooring, and contents.
- Remove standing water as quickly as possible.
- Ventilate your home by opening windows and doors when outside humidity is lower than indoors.
- Discard porous materials that cannot be cleaned and dried within 24–48 hours.
Two realities guide the rest of this process: water finds hidden paths, and moisture lingers in materials long after surfaces seem dry. Your mission is to uncover, remove, and thoroughly dry the water you can see—and the moisture you can’t.
Safety First: What to Do Before You Start Cleaning
Coming back to a flooded house is emotional, but safety must lead every decision. Floods can leave behind structural damage, electrical hazards, gas leaks, and biological contaminants. Rushing in can be as dangerous as the storm itself.
Wait for the official all-clear from local authorities before returning. On arrival, inspect the exterior from a safe distance. Look for leaning walls, foundation cracks, sagging roofs or ceilings, and displaced stairs. If anything suggests structural instability, do not enter. FEMA recommends a building inspector or structural engineer evaluate the home before you go inside.
Immediate Safety Steps for a Flooded House
- Turn off utilities. Water and electricity are a lethal combination. Shut off the main breaker before entering. If you can’t safely access the panel, call a licensed electrician. If you smell gas or hear hissing, shut off the main gas valve if accessible, open windows, leave immediately, and call your gas company from a safe location.
- Gear up. Floodwater often contains sewage, chemicals, and sharp debris. Wear an N95 or P100 respirator, goggles, waterproof boots, and heavy-duty gloves. Long sleeves and pants help protect against cuts, rashes, and contaminated splashes.
- Ventilate first. If weather permits and the structure is stable, open doors and windows for at least 30 minutes before spending time inside. This helps clear fumes and lowers initial humidity.
- Document thoroughly. Before moving anything, record room-by-room photos and videos—wide shots, close-ups, and serial numbers on appliances and electronics. The National Flood Insurance Program’s damage documentation guidance explains what adjusters need to see for your claim.
- Beware of hidden hazards. Floodwater can contaminate everything it touches. The CDC warns about mold, sewage, and other health hazards when reentering a flooded home. Discard any food or medicine exposed to floodwater, and use bottled water until authorities declare tap water safe. Do not energize submerged electrical systems or appliances until a professional has inspected them.
- Be generator-safe. Never run a portable generator inside your home or garage, and keep it at least 20 feet away from windows and doors to prevent carbon monoxide poisoning.
Understanding Water Categories and Exposure
Not all floodwater is equal. Clean water from a supply line can become contaminated quickly after contact with building materials and soils. Outdoor floodwater is considered “black water,” containing sewage, chemicals, and pathogens. Treat it as hazardous from the start and plan disposal and disinfection accordingly.
If anyone in your household has asthma, severe allergies, is immunocompromised, elderly, or very young, keep them out of the home during cleanup. If you’re recovering from injury or illness, consider hiring professional help to avoid respiratory or infection risks.
The Ultimate Cleanup Guide for Your Flooded House
Once the area is safe and you’ve documented the damage, you can begin cleanup. The goal is to remove water and contaminants quickly while preserving anything that can be safely salvaged.
Step 1: Remove Standing Water and Debris
- Pump out standing water. Use a submersible pump for deep water and a wet/dry vacuum for shallow pooling. If you have a basement, lower the water level gradually to avoid structural pressure imbalances.
- Muck out debris. Shovel out mud and silt to prevent future odors and microbial growth.
- Save samples for insurance. Cut a small sample of damaged carpet, padding, flooring, and drywall for your adjuster. Keep these samples dry and bagged with labels.
- Separate by category. Create piles for trash, recyclables, electronics, and hazardous waste (paints, solvents, batteries). Follow local guidance for curbside pickup after disasters.
Step 2: Prioritize Health and Personal Protective Equipment (PPE)
PPE is non‑negotiable. Wear an N95 or P100 respirator, tight‑fitting goggles, waterproof boots, and heavy‑duty gloves whenever you are in the home. Change gloves and respirators as they become soiled or damp. Wash exposed skin with soap and clean water after each work session.
Step 3: Sorting and Discarding—What to Keep and What to Toss
Porous items absorb contaminated water and are difficult, often impossible, to fully sanitize. Use the 24–48 hour rule: if you cannot completely clean and dry a porous item within two days, discard it to prevent mold and bacterial growth.
- Toss immediately: mattresses, upholstered furniture, pillows, carpet and padding, wet insulation, water‑damaged drywall, particleboard furniture, books and papers (unless irreplaceable and professionally restored), and any food that contacted floodwater.
- Potentially salvageable: solid wood furniture, metal, glass, and hard plastics after thorough cleaning and disinfection. Launder clothing and linens in hot water with detergent and disinfectant if safe for the fabric. Submerged appliances require professional inspection before use.
While standard policies don’t cover flood damage, knowing your broader protections can still help. For instance, damage from a storm‑related roof leak may involve your homeowners policy. Learn more about what’s typically included at https://floridaallrisk.com/homeowners-insurance-florida/.
Step 4: Strip Out Water‑Damaged Building Materials
Moisture wicks into walls and floors. Removing water‑logged materials quickly accelerates drying and reduces the odds of mold.
- Drywall and insulation: Cut drywall 12–24 inches above the visible water line (a “flood cut”). Remove any damp insulation behind it. Dispose of both safely.
- Flooring: Remove carpet, padding, and many laminates. Hardwood can sometimes be saved but may require removal to dry the subfloor properly and often needs professional evaluation.
- Subfloor: Clean, disinfect, and dry the subfloor thoroughly. Use a moisture meter to confirm the moisture content is below 16% for general rebuilding, and at or below about 13% before installing new hardwood flooring.
Step 5: Clean and Disinfect
- First pass: Scrub hard surfaces with a detergent and water solution to remove dirt and biofilm—this physical removal step is essential.
- Disinfect: After cleaning, use an appropriate disinfectant (follow product labels for dwell times). Do not mix cleaning chemicals. Provide ventilation during and after application.
- Odors: Persistent musty odors often signal hidden moisture. Do not mask odors—locate and remove the source, then dry thoroughly.
Step 6: Set Up for Drying
Before dehumidifiers and fans go to work, open interior doors and drawers, remove toe‑kicks on cabinets if water reached them, and elevate furniture on blocks to improve airflow. Plan for continuous operation for days to weeks, depending on the extent of saturation and ambient humidity.
The Race Against Time: Drying Your Home and Preventing Mold
Once debris is cleared and damaged materials are removed, it’s time to dry the structure. Your strategy is simple: maximize airflow across wet surfaces and continuously remove moisture from the air.
Effective Drying Techniques
- Air movement: Use high‑velocity fans to push dry air across wet surfaces. Angle fans to promote directional airflow and exhaust humid air out doors or windows where feasible.
- Dehumidification: Run dehumidifiers continuously to bring indoor humidity below 50%. In humid climates, choose models rated for higher pints per day. Aim to keep indoor relative humidity under 50%, and always below 60%, during drying.
- Monitor progress: Use a hygrometer to check indoor humidity and a moisture meter to measure inside walls, subfloors, and framing. Materials can feel dry on the surface while trapping moisture within. Do not rebuild until readings are consistently within safe ranges.
- HVAC caution: Do not use your HVAC system if it was affected by floodwater until a licensed professional inspects and cleans it; otherwise you risk spreading contaminants and mold spores through the ductwork.
Drying times vary. With professional‑grade equipment, minor events may dry in several days, while structural wood elements can take weeks. Patience here prevents costly mold remediation later.
Mold Prevention and When to Call Pros
Mold can begin within 24–48 hours in warm, damp environments. Even with rapid drying, small patches may appear.
- Small areas (under 10 square feet): You can typically clean these yourself while wearing full PPE. Use detergent and water to physically remove mold; avoid overreliance on biocides alone. Dry immediately afterwards.
- Larger or complex situations: If mold covers more than 10 square feet, you suspect contamination in the HVAC system, or you have persistent musty odors or health symptoms, call a licensed mold remediation professional. These situations often require containment, negative air, and specialized filtration to avoid cross‑contamination.
If you live in a multi‑unit building, moisture can migrate between units and common areas. Coordination with your association and neighbors is key; learn more about considerations unique to shared structures at https://floridaallrisk.com/condominium-insurance-claims/.
For authoritative guidance on flood cleanup practices and mold, see the EPA’s Flooded Homes Cleanup Guidance and the CDC’s mold cleanup recommendations. These resources outline safe methods, PPE, and thresholds for DIY versus professional help.
Recovery and Rebuilding: Insurance Claims and Future‑Proofing
After you stabilize the home and start drying, shift into documentation and financial recovery. Careful records support your claim and help you make informed decisions about repairs.
Document, Document, Document
- Save receipts for pumps, fans, dehumidifiers, generators, cleaning supplies, and protective gear.
- Keep contractor estimates and invoices, and note what portions relate to mitigation (emergency work) versus repairs.
- Create a contents inventory: item, description, brand/model, age, condition before the flood, original cost, and estimated replacement cost. Photographs and serial numbers strengthen your documentation.
- Continue taking photos as you remove materials and as drying progresses. Photograph moisture meter readings and label the location and date on each.
Flood Insurance Basics and Filing Your Claim
Standard homeowners insurance typically does not cover damage from external flooding such as storm surge or overflowing rivers. Protection for flood damage usually requires a separate policy—either through the National Flood Insurance Program (NFIP) or a private insurer. If you already carry coverage, take these steps:
- Contact your agent immediately. If you have coverage through Florida All Risk Insurance, report the loss and confirm policy details at https://floridaallrisk.com/flood-insurance-florida/.
- Understand coverage terms. Know your building and contents limits, deductibles, and whether items are settled at Actual Cash Value (ACV) or Replacement Cost Value (RCV). ACV accounts for depreciation, while RCV pays to replace with new items of like kind and quality.
- File a Proof of Loss. The NFIP generally requires a signed and sworn Proof of Loss within 60 days of the flood, unless the deadline is formally extended for a specific event. This is a strict requirement. The National Flood Insurance Program provides forms and instructions.
- Meet the adjuster prepared. Be present for inspections, bring your inventory and receipts, and point out hidden areas (behind baseboards, inside closets, crawl spaces). Keep a log of all communications.
Note: NFIP policies do not cover Additional Living Expenses (ALE). If repairs will take time, discuss temporary housing options and cost management with your agent and contractors.
Understanding your property’s risk profile helps you plan ahead. Check your zone and risk factors using the FEMA mapping tools linked through https://floridaallrisk.com/fema-flood-zone-map/.
Selecting Contractors and Avoiding Scams
- Verify licenses and insurance. Request proof of workers’ compensation and liability coverage.
- Get multiple written estimates with clear scopes of work and timelines.
- Avoid large upfront payments. Pay by milestones for completed work.
- Be cautious of door‑to‑door offers and pressure tactics after disasters.
- Keep all warranties, lien releases, and change orders in writing.
Rebuilding for Resilience
When you repair, rebuild smarter to reduce future damage and costs:
- Elevate utilities. Raise electrical panels, outlets, HVAC components, and water heaters above projected flood levels.
- Install engineered flood vents in enclosed crawl spaces to equalize hydrostatic pressure and reduce structural damage risk.
- Improve site drainage. Regrade so water flows away from the foundation; consider swales or French drains where appropriate.
- Choose flood‑resistant materials. Favor tile, sealed concrete, solid wood, closed‑cell foam insulation, and paperless gypsum products in lower levels. Avoid carpet in flood‑prone areas.
- Seal gaps. Install backflow preventers on sewer lines where permitted, and seal foundation penetrations to reduce water intrusion pathways.
- Maintain defensible storage. Keep important documents and valuables in watertight containers elevated above likely waterlines.
To assess whether you have the right protection before the next season, use the Flood Insurance Risk Assessment at https://floridaallrisk.com/flood-insurance-risk-assessment/ and explore typical pricing at https://floridaallrisk.com/how-much-does-flood-insurance-cost-in-florida/.
Organizing Your Paper Trail for the Long Haul
Create a secure digital folder (cloud‑based, with offline backups) for all flood‑related records: insurance correspondence, receipts, bids, permits, warranties, photographs, and inspection reports. Good organization speeds claim payments, eases tax deduction tracking where applicable, and simplifies future refinancing or sale disclosures.
Frequently Asked Questions about Cleaning a Flooded Home
How long does it take for a house to dry out after a flood?
There’s no single timeline. Minor incidents may dry within several days using robust fans and dehumidifiers. Heavily saturated structures, especially those with water‑logged framing and subfloors, can take weeks. Prioritize measurable progress: verify with a moisture meter that framing and subflooring are at or below roughly 15% before closing walls, and closer to 13% if installing hardwood floors. Rushing to rebuild over damp materials is one of the most common causes of recurring mold.
Can I clean up a flooded house myself?
It depends on the source and scope of water, the extent of damage, and your health. DIY may be reasonable for small events caught early, with clean water and limited affected areas. Always use proper PPE and disinfection procedures. Call professionals for:
- Large‑scale flooding affecting multiple rooms or levels.
- Natural floodwater (“black water”) or sewage contamination.
- Mold covering more than 10 square feet, suspected HVAC contamination, or persistent musty odors.
- Situations involving high‑risk occupants (asthma, severe allergies, immunocompromised, very young, or elderly).
Does homeowners insurance cover a flooded house?
Typically no, if the damage is from external flooding such as storm surge, heavy rainfall pooling, or rising water. Standard policies generally cover sudden and accidental water damage from inside the home, such as a burst supply line, but not flooding from outside. Separate flood insurance is needed for that risk. Learn what your policy may cover at https://floridaallrisk.com/homeowners-insurance-florida/ and explore flood coverage at https://floridaallrisk.com/flood-insurance-florida/.
What should I do with appliances and electronics?
If they were submerged or splashed by contaminated water, unplug them and do not power them on. Salt and silt can cause electrical shorts and corrosion. Have a qualified technician inspect them. For insurance, photograph serial numbers and model labels before removal.
How do I handle important documents and photos?
If they’re irreplaceable, place them in freezer bags and freeze promptly to halt deterioration. Many conservation professionals can later thaw and restore them. Photograph each item to document loss or damage before storage or restoration.
Is bleach the best cleaner for a flooded house?
Bleach can disinfect hard, non‑porous surfaces when used correctly, but it is not a cleaner and is less effective if dirt or biofilm is present. First remove soil with detergent and water, then apply an appropriate disinfectant following label directions and ensuring good ventilation.
When can I turn the HVAC back on?
Only after a professional confirms it’s safe. Ductwork and air handlers exposed to floodwater can conceal contaminants. Running the system too early can distribute mold spores and fine particulates throughout the home.
How can I lower future flood risk without major renovations?
Small steps matter: move valuables to higher shelves, store documents in watertight containers, keep gutters and downspouts clean, extend downspouts away from the foundation, install backflow preventers where allowed, and maintain an emergency kit with pumps, extension cords rated for wet conditions, and spare filters.
Conclusion: From Recovery to Resilience
Facing a flooded house is daunting, but a calm, organized approach reduces health risks, speeds drying, and protects your finances. Start with safety, document everything, remove water and damaged materials quickly, dry thoroughly with measurable targets, and build back with smarter materials and elevated systems.
Preparation is a powerful form of peace of mind. Reviewing your coverage, understanding your property’s specific flood risk, and keeping a clear action plan on hand can turn a chaotic situation into a manageable one.
Ready to strengthen your safety net before the next storm? Get a comprehensive flood insurance quote today at https://floridaallrisk.com/flood-insurance-florida/. Don't wait until it's too late—flood insurance typically has a 30-day waiting period before coverage begins.
Take control of your flood protection now. Schedule your Flood Insurance Risk Assessment to identify coverage gaps and options at https://floridaallrisk.com/flood-insurance-risk-assessment/. Our experts will help you understand your property's unique risks and find the right coverage to protect your investment.
Contact Us
Recovering from a flooded house is challenging—navigating coverage shouldn’t be. As an independent agency in Saint Petersburg, we work with a wide range of carriers to help you tailor protection for your home and budget.
Florida All Risk Insurance
Saint Petersburg, FL
Email: [email protected]
Website: https://floridaallrisk.com/
If you prefer in-person support, contact us via email to schedule a time to talk through your options and questions.